How to send Styled Text bulk email. MaxBulk Mailer supports several message formats. One of them is the Styled Text format. It is one of my favorites because of its simplicity. Indeed, anyone can use it without any previous knowledge.
With MaxBulk Mailer, when you need to deliver a message to your contacts you have the choice between several formats. You can send your email in Plain Text, Styled Text, HTML, or even using the Markdown format.
Depending on the type of message, a format can be better than another. The Plain Text format is simple but quite limited, the Styled Text format is also very easy to use but allows styles, HTML allows you to send amazing emails but it is a bit more complex and Markdown is great but needs you to know the format.
What is the Styled Text format
The Styled Text format is a text format that allows formatting and styles. Unlike the Plain Text format, you are allowed to use bold, italic, underline, colors, different text sizes, and whatever font supported by your operating system. As a result, you can customize your message and even embed links into text like in web pages.
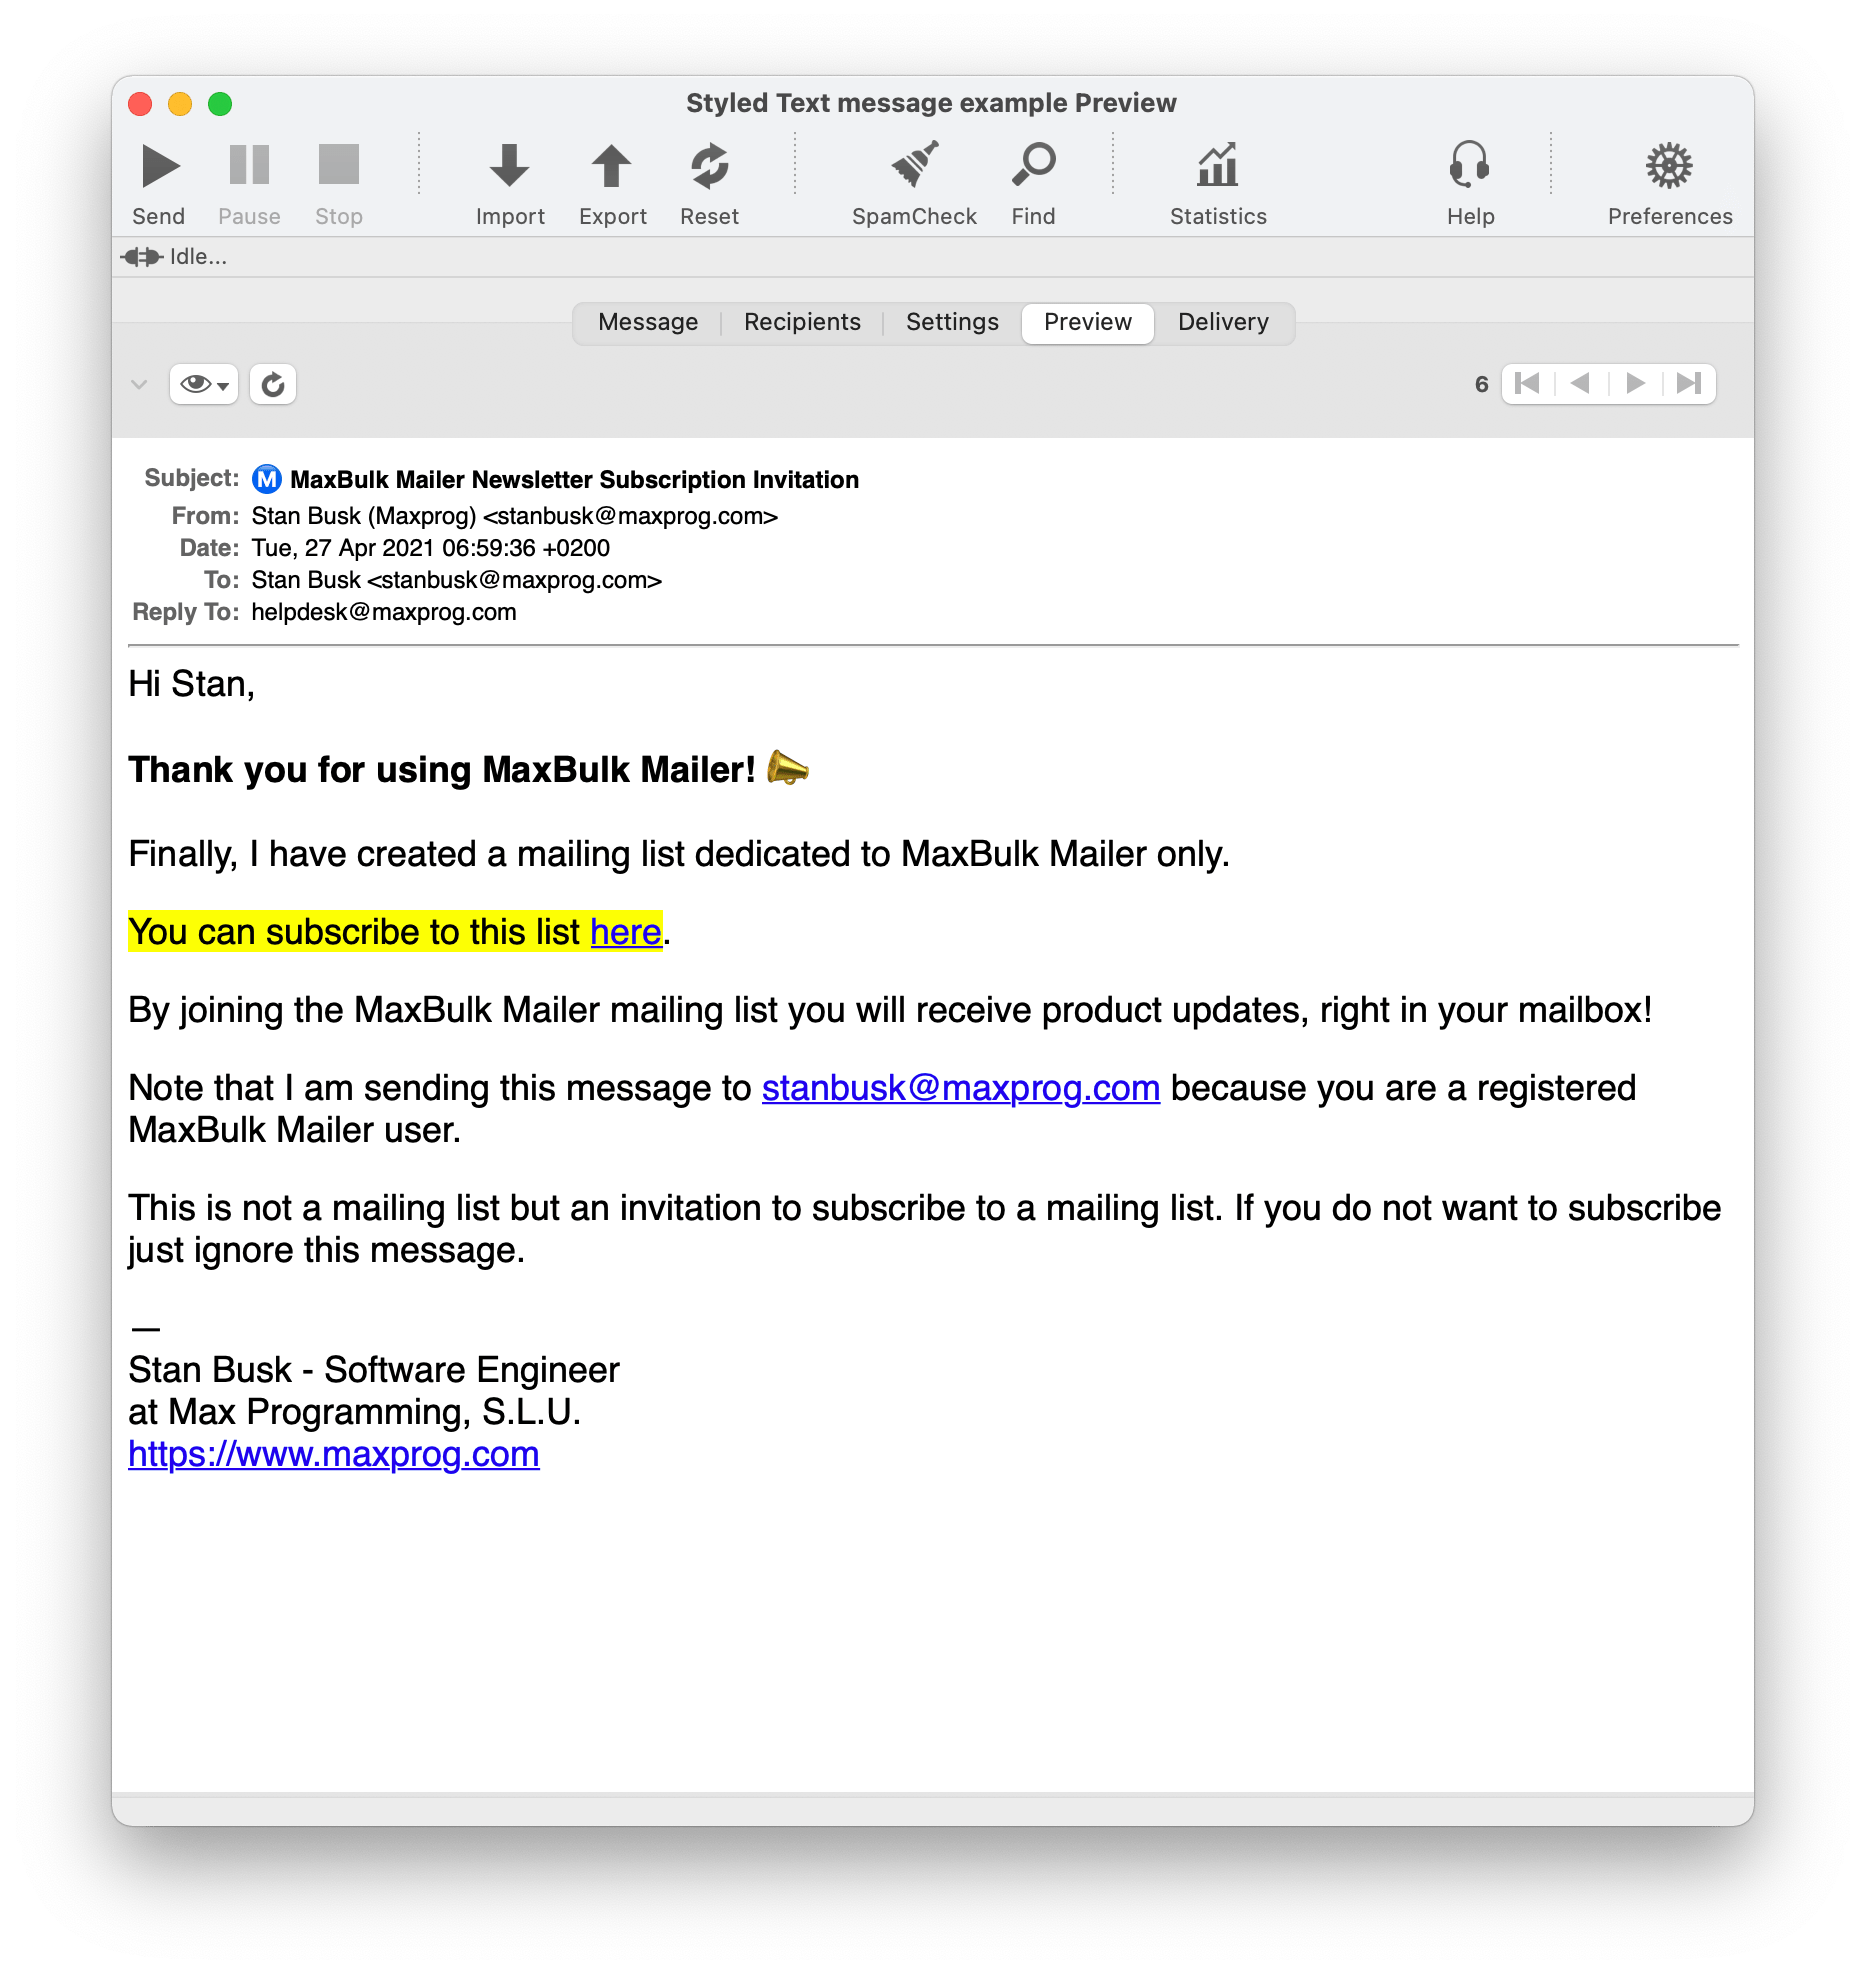
In just a few minutes, it is perfectly feasible to write an email and get it ready to be sent. In addition, you can preview the full message including the headers (From, To, Subject, etc.) at any time and make sure everything looks as expected.
Furthermore, you can add pictures, insert emojis, change the background color, align the text (center, justify, right) and even use tags to display the recipient’s data into the message like any other MaxBulk Mailer format.
Note that Styled Text is just text you can format by using the formatting toolbar. However, MaxBulk Mailer will convert it into HTML at the delivery time. This is completely transparent but it allows you to insert pieces of HTML code into your message. HTML code added this way will go through the HTML converter as is.
In conclusion, the Styled Text format is something you have to look at. Maybe be it is just enough for what you need in terms of email delivery. Above all, it is very easy to use.
How to send Styled Text bulk email
Just create a new document and select Styled Text from the format pull-down menu if not already selected. Indeed you can set this format as the default in the MaxBulk Mailer preferences.
Once you select that format you will get a formatting toolbar just above the message field.
You can now write your message and apply styles. As said before you can preview your message by clicking on the Preview tab at any time.
Make sure you don’t use unsupported fonts. I mean, perhaps a recipient of yours will read your message on a computer with a different operating system. So better use standard fonts like Helvetica, Verdana, Arial, etc. A missing font may cause a slightly different message appearance because it will be replaced with another one.
Some recommendations when using Styled Text
Nowadays the trend is to use short messages split into small chapters with short sentences. Please avoid overloading your message with irrelevant text. Make it very clear. Furthermore, I recommend using a decent text size anybody can read without straining its eyes (and even without glasses). What about Verdana 20? Do you think it looks too big? Well, it turns out it is what I use here at Maxprog for all our bulk email campaigns.
If you are sending a marketing message make sure you also include a call-for-action button or link and a working landing page. You will find more information about this here: How to create a landing page for your email campaign?
It is also a great idea as usual to customize your message with each recipient´s data. As I have said many times it is important that your customer believe the message was sent to him only. I explain this in detail here: How to send personalized mass emails.
What about pictures? (MaxBulk Mailer 8.8.4 or higher)
Create a new email campaign or edit an existing one. Find where you want to insert the picture in your email content and select the ‘Message > Insert Image > From an online server’ menu. The following will be inserted into your message:
{Insert Image: url, alignment, link, max-width, width, height}
Next replace the ‘url’ parameter with the image absolute URL, like for example: https://www.maxprog.com/img/ostrich.jpg. You can live the other settings as is. Preview your email to ensure everything looks good. By default the picture will be left-aligned. You can of course change the alignment, set a link to a web page, set the width and the height replacing the corresponding parameters in the tag.
Note that the following syntax is also valid: {Insert Picture: URL, alignment, link, max-width, width, height}
Inserting pictures with MaxBulk Mailer 8.8.3 or lower
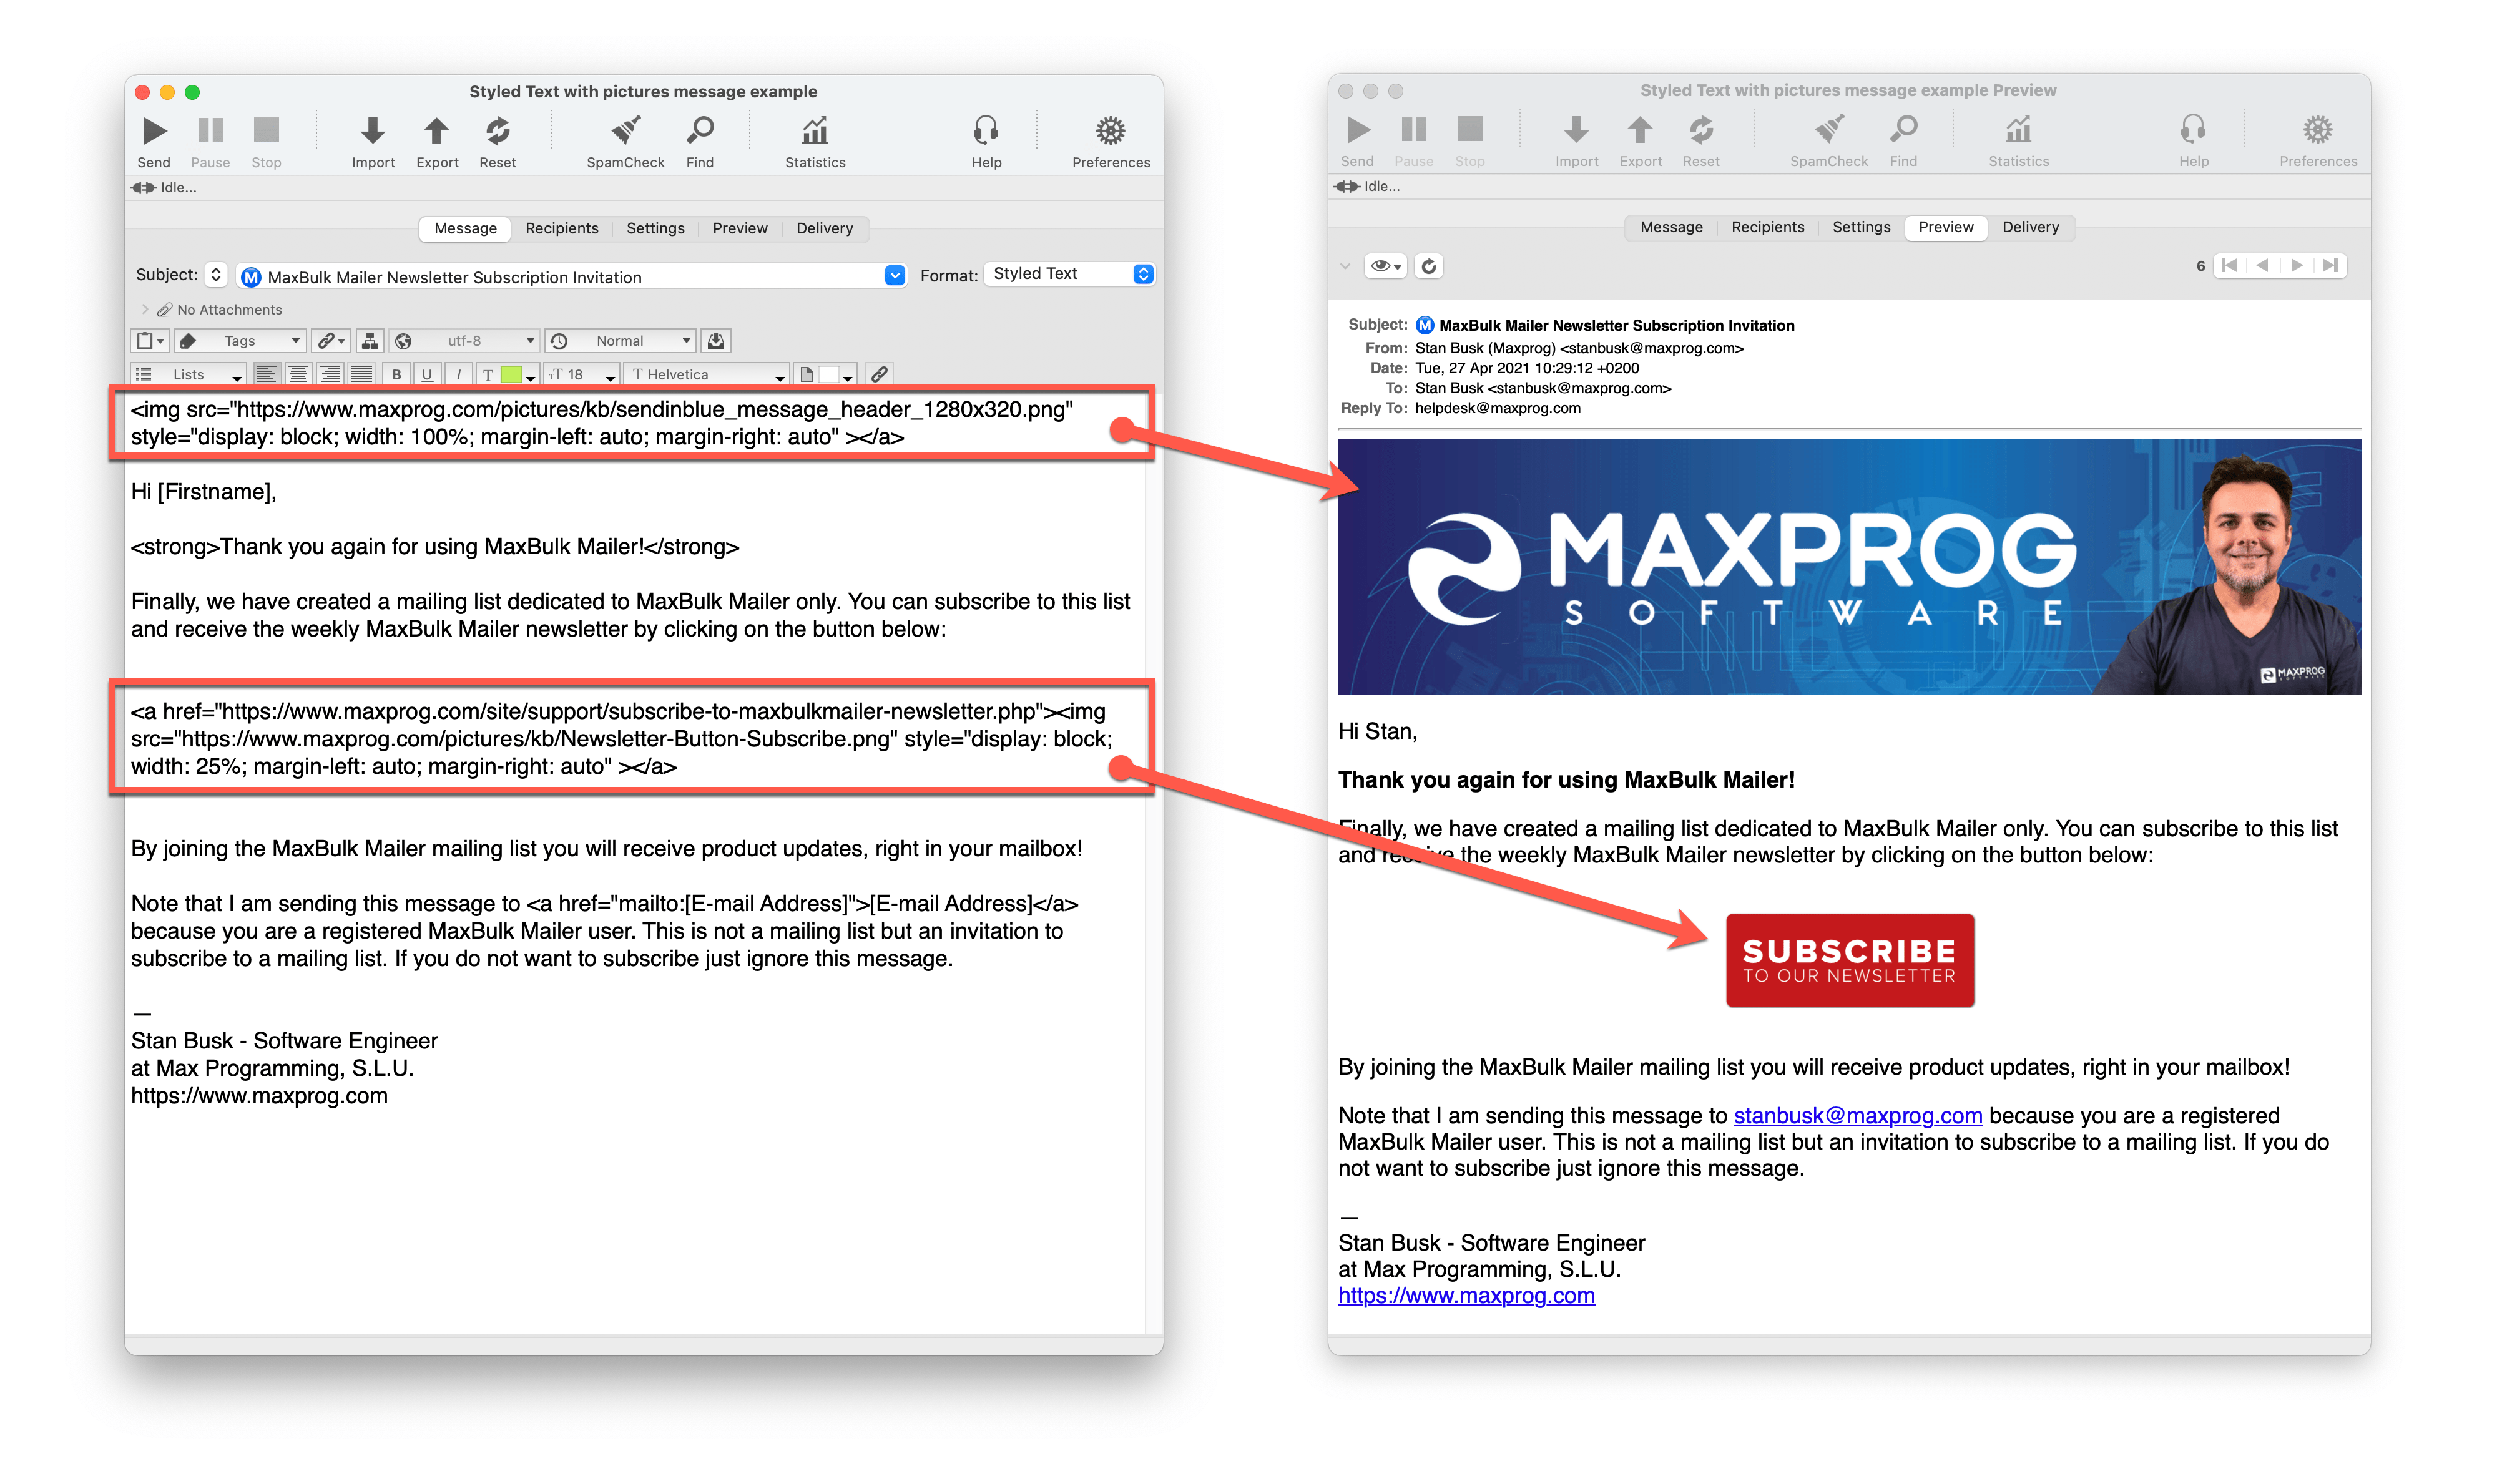
On older MaxBulk Mailer versions you can do it by adding HTML code to fetch the picture from your website. You just need to use this code replacing IMAGE_URL_HERE with the real URL:
<img src="IMAGE_URL_HERE">
For example, try to copy and paste the line below to MaxBulk Mailer and click on the Preview tab:
<img src="https://maxprog.com/img/ostrich.jpg">
and if you need to center the picture here is the code:
<img src="IMAGE_URL_HERE" style="display: block; margin-left: auto; margin-right: auto">
For example, try to copy and paste the line below to MaxBulk Mailer and click on the Preview tab:
<img src="https://maxprog.com/img/ostrich.jpg" style="display: block; margin-left: auto; margin-right: auto">
Adding a YouTube Video in an Email
Adding a YouTube video is a fantastic way to grab your audience’s attention and boost engagement.
First, choose the perfect video from your YouTube channel that aligns with your email’s message and goals. Next, locate the ‘Share’ button below the video on YouTube and click on it.
You’ll see an option to ‘Copy video URL.’ Click on it. You’ll get something like https://youtu.be/4TjEnQTA4bQ. Now, head over to your email marketing platform – let’s say you’re using MaxBulk Mailer for this example.
Create a new email campaign or edit an existing one. Find where you want to insert the video in your email content and select the ‘Message > Insert Video’ menu. The following will be inserted into your message:
{Insert Video: id, alignment, width, thumbnail}
Then replace the ‘id’ parameter with the Youtube video id, in this case it is 4TjEnQTA4bQ (taken from the URL https://youtu.be/4TjEnQTA4bQ we copied before). You can live the other settings as is. Preview your email to ensure everything looks good. By default the video will be centered and will use the default Youtube thumbnail. You can of course change the alignment, width and thumbnail replacing the corresponding parameters in the tag.
How can I add hyperlinks
In order to add hyperlinks to your message, it is recommended to use the Hyperlink Manager. Using the Hyperlink Manager will guarantee your link will be properly formatted.
Select the “Edit > Insert Hyperlink > Edit” menu and add your hyperlink(s). Then use the “Edit > Insert Hyperlink > your hyperlink” to insert it into your message.
A faster way is to write your link text, select it and right-click on it pressing the Shift key and then selecting the “Link To URL” menu (or select the “Message > Link to URL” menu from the main menu bar or click on the hyperlink button in the toolbar right above the message field). Enter your URL and click on the Ok button. The Hyperlink will be added to the Hyperlink Manager and the text replaced by the proper hyperlink tag.
How can I insert HTML code
When we insert pictures the way we have done above, we have already used HTML code actually. However, we can do much more than that. We can also add tables, set a given piece of text background, insert a picture with a link, add separators, etc.
Here you see how to send a link to a PDF with a picture with text on the right and surrounded by a rounded frame: How can I send a link to a PDF. Feel free to copy and paste the code to a MaxBulk Mailer document a try by yourself.
You can also change the text background color with the following code:
<mark> Free offer until Sunday! </mark>
Free offer until Sunday!
and both the text and the background color this way:
<mark style="color: white; background: red"> Hurry Up! </mark>
Hurry Up!
or even with a rounded background:
<mark style="color: white; background: blue; border-radius: 10px; padding: 5px"> $99.99 only! </mark>
$99.99 only!
You can also add a separator with this code:
<hr>
and you also change the separator appearance this way:
<hr style="border-top: 5px dotted grey">
You can a table with this code:
<table>

<tr style="color: white; background-color: blue"><td> Product </td><td> Price </td></tr>

<tr><td> MaxBulk Mailer </td><td> $54.90 </td></tr><tr><td> eMail Verifier </td><td> $24.90</td></tr>

<tr><td> eMail Extractor </td><td> $24.90 </td></tr>

</table>
| Product | Price |
| MaxBulk Mailer | $54.90 |
| eMail Verifier | $24.90 |
| eMail Extractor | $24.90 |
You can also hide words, sentences of full paragraphs with the special HTML <!– and –> codes this way:
<!-- Text to hide -->
Finally, when writing your message, you likely discovered that only one remains if you write several consecutive spaces. All the others vanish from the final message. That is again because MaxBulk Mailer converts Styled Text into HTML, and HTML doesn’t support successive spaces. However, there is a way to overcome this limitation. Just add non-breaking spaces instead of regular spaces. You can add non-breaking spaces using the Option + Space shortcut!
In conclusion, with the Styled Text format, you can do a lot of interesting things, it is well worth a try actually.
Once you have created a great design you can simply save a template by using the MaxBulk Mailer ‘File > Save As Template’ menu and reuse your formattings.
And remember that you can click on the ‘Preview’ tab and see what your message looks like at any time.