How to import transactions from a Bank statement into iCash? It turns out that iCash offers the possibility to import transactions from bank statement files directly into your personal finance.
This is a great time-saving feature since you no longer have to type what you can already download from your online bank account.
You just need to connect to your Bank, download the statement, or the transactions as a text file and then import that file to iCash.
The magic is made thru a special window that includes a rule editor and a live preview.
All you have to do is to select the Bank Account (the statement is of), default Income and Expense target accounts and finally create some rules.
The importation system processes the Account Statement file applying the rules you have defined to all the transactions.
If a rule validates a transaction, iCash automatically uses the rule data. Otherwise, iCash simply uses the default accounts and data you have set.
You can preview the result and check how iCash will add the transactions to your accounting. Only when you are fully satisfied you can tell the software to import them.
At first glance it can look complex but actually this system is based on logic, keep reading and you will understand how it works.
How to import transactions from a Bank statement
In order to import transactions from a Bank statement into iCash, first, you have to connect to your Bank and download a Bank Statement. For that matter, it can be either a Bank Statement or simply the list of the transactions you want to add to iCash.
The file has to be a plain text file. If you download an Excel sheet you will have to open it with Excel and save a text copy of it. If you download a Word document you will have to open it with Word and save a text copy of it.
iCash is unable to work with Excel or Word documents directly, only plain text files.
If your Bank only allows QIF, OFX or QFX exports then just use the iCash QIF, OFX or QFX import options.
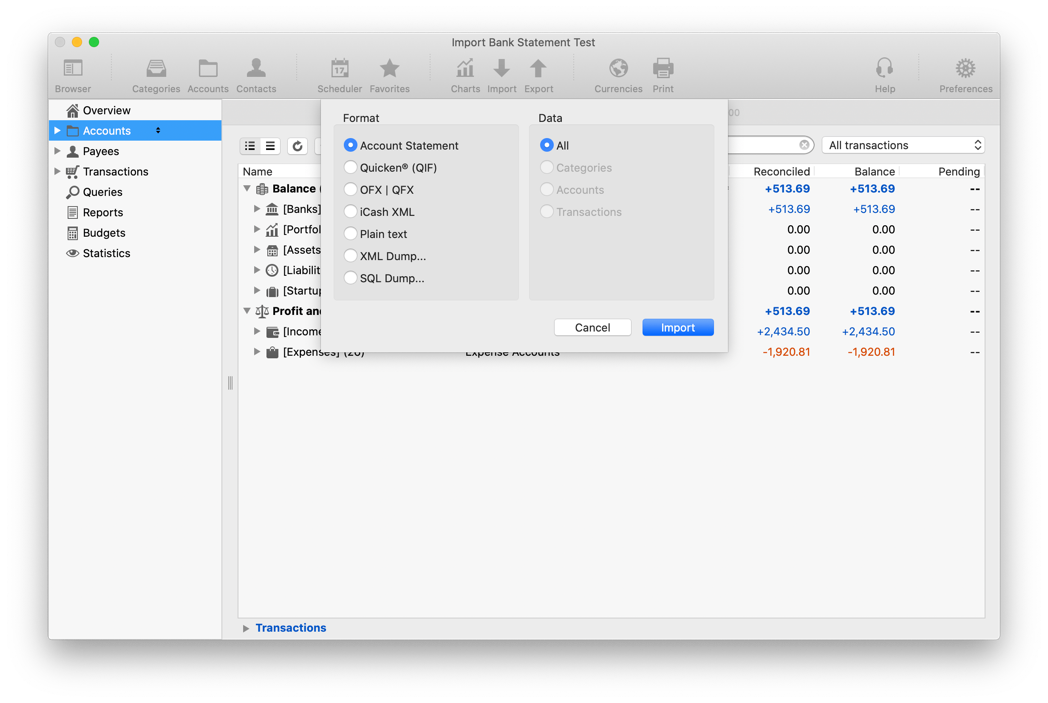
To start importing transactions from your Bank Statement click on the toolbar Import button. You will get a window with several choices, one of them is Account Statement, it is actually the default option.
Click on the Import button and select the import file. iCash then displays the Account Statement Import window.
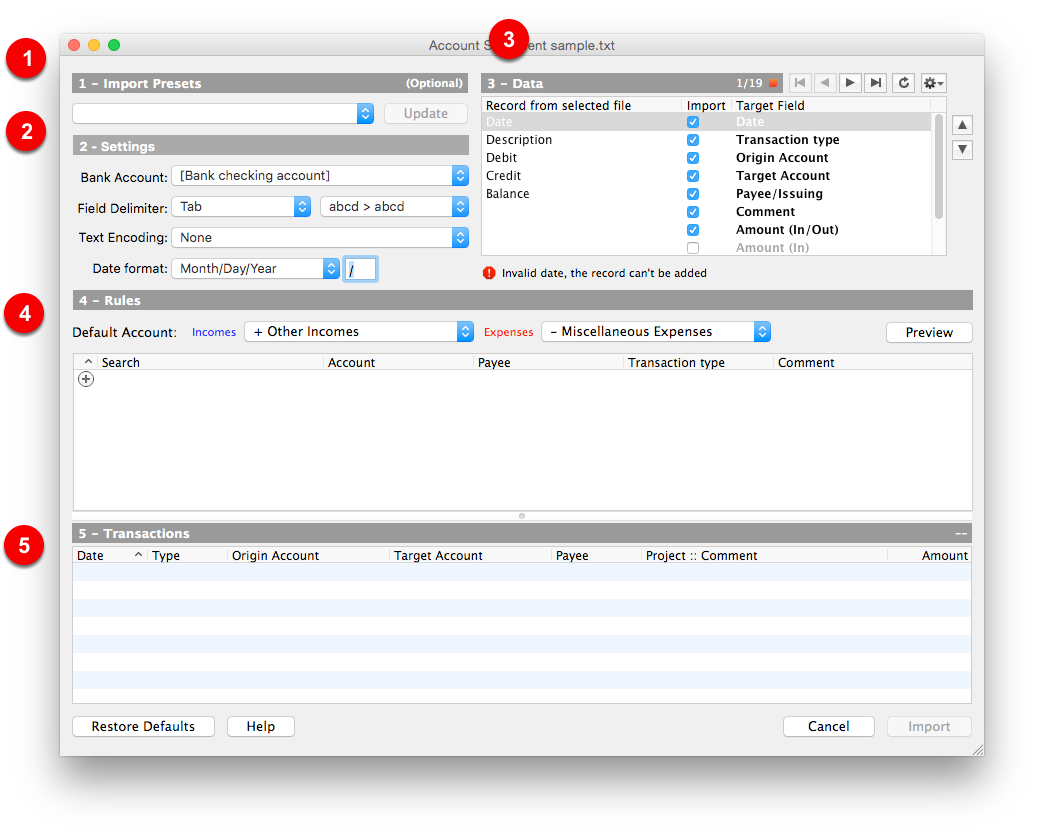
The Account Statement Import window
The Account Statement Import window is made of 5 panels labeled:
- Import Presets (#1) to save and restore your settings.
- Settings (#2) to select the bank account (the statement is of) and tell iCash about your file format.
- Data (#3) to see the records from your file and to line-up fields.
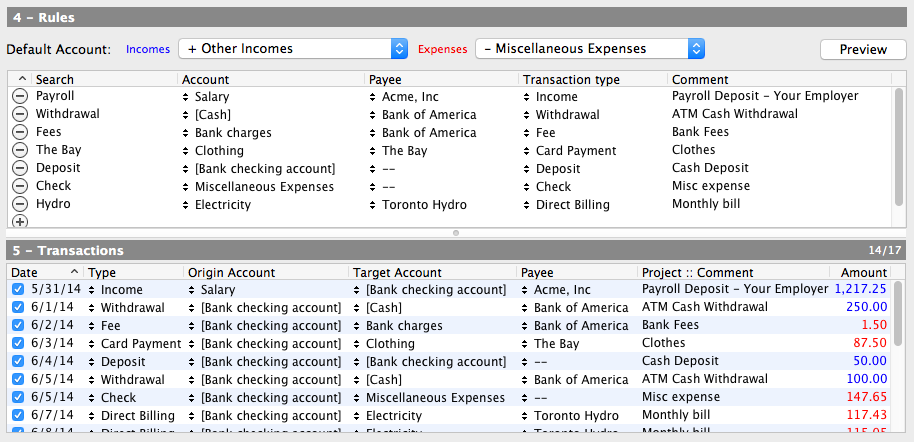
- Rules (#4) to set the default income and expense accounts and to tell how iCash has to create the transactions.
-Transactions (#5) where you can finally see what will be imported. Let see those 5 panels in detail.
The Import Presets panel (#1)
You can save and restore your import settings from panel #2, #3, and #4 (except rules) with just one click. Just use the 'Import Preset' pull-down menu.
You can edit and save the Presets whenever needed, you just have to click on the Update button.
That button will actually enable itself automatically as soon as a change is detected. Note that rules are not really saved along with the other import settings but are associated with the selected Bank Account instead.
The Settings (#2)
This is the place where you tell iCash about the Bank Account the statement file is about, the Field Delimiter, the Text Encoding and the Date format. Those settings are very important, iCash can get into troubles to display records if you don't select the right field delimiter. The imported text may contain weird symbols if you don't select the right text encoding and iCash may not import the records at all if the date format is wrong. In addition, you can also change the case of the input text. You can quickly see the impact of this in the Data panel on the right, #3.
The Data (#3)
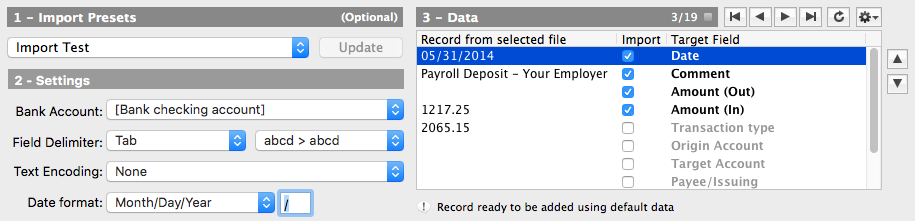
This panel is a viewer of your file. It matches the settings you have selected. You can go thru records by using the navigation arrow buttons. It is important to make your file fields (left) match the panel fields (right). To do that select the target field (right) and move it to the right place either by drag and drop or by using the up and down arrow buttons. Repeat the operation as many times as you need, from bottom to top. In the end, your file date field will be in front of the panel date field. Your file description field will be in front of the panel description field, and so on. Note that you have to mark/check the fields you want to import (center).
Validation errors
You can look at the record current validation status right below the field list. It indicates if iCash has found an issue:
- Invalid date, iCash can't add the record . You may have selected a date format that doesn't correspond to the file format or the date field doesn't match the iCash date field.
- Empty comment, iCash can't apply the rules. The comment field doesn't match iCash comment field, it is unchecked or really empty in such case rules are useless for that record.
- Null amount, check the record field order. The amount field doesn't match iCash amount field, it is unchecked or really null. This is just a warning, you can actually add null transactions.
If everything is correct
- iCash can add the record using the default data. The record doesn't match any rule, the software will add it using the default Income and Expense accounts.
- iCash can add the record using rule #xx data. The record matches rule number #xx, the software will add it using the data from that rule.
In addition, iCash displays a grey, blue, red or yellow square icon next to the record number in case the record:
- doesn't match any rule (grey).
- matches a rule (blue).
- has a date format problem (red).
- looks to have an empty comment (yellow).
- has a null amount (yellow).
Note that next to the navigation buttons you will find a button that lets you jump to the next unchecked record (the next record not yet handled by a rule). Furthermore, a Tool button allows you to go to a specific record or find a given peace of text in all the records.
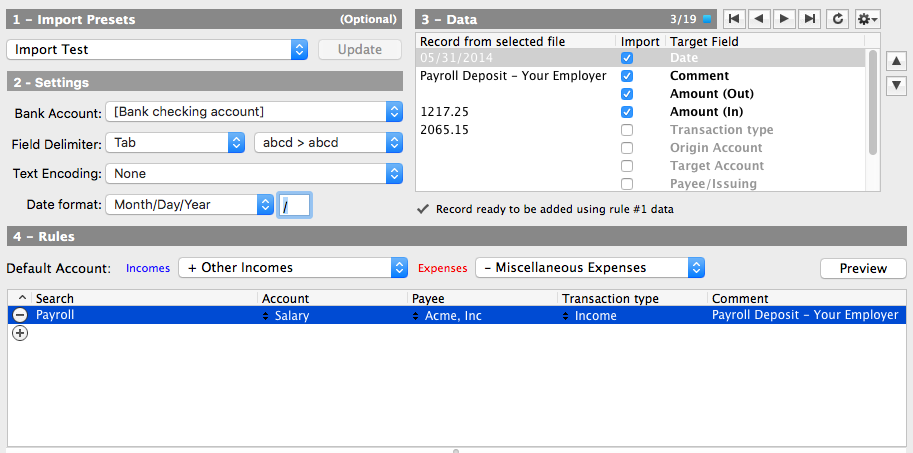
The Rules panel (#4)
First select the default Incomes and Expenses accounts. iCash will use those accounts for records not matching any rule.
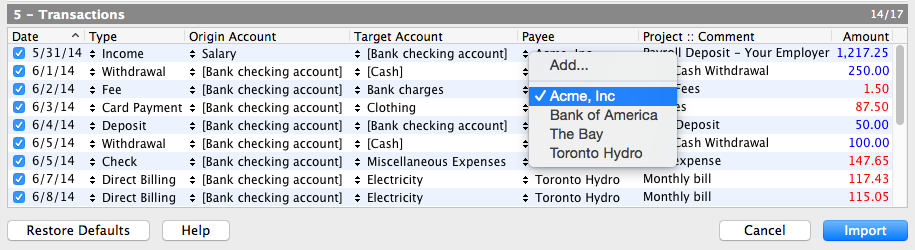
To add a rule first move to the record to process in Data (#3). Use the navigation arrow buttons or the jump to the next unchecked record button next to them. Then, click on the (+) button in the Rules list. iCash fills the search column automatically with the selected record comment. Finally select the Target Account, the Payee, and the transaction type. Modify the comment if needed. That's all. Repeat the same steps for any of the records you want to process automatically with a rule.
The Transactions panel (#5)
You can click on the Preview button at any time and see how iCash would create the transactions from your Bank Statement file using the current rules and settings.
It is easy to identify the transactions that are using defaults since they have no transaction type nor Payee defined but a red background. On the right, you can see two numbers x/y, the number of transactions created thanks to the rules (x) followed by the total of transactions in the list (y). In the example above only 3 transactions were added using defaults (17 - 14 = 3).
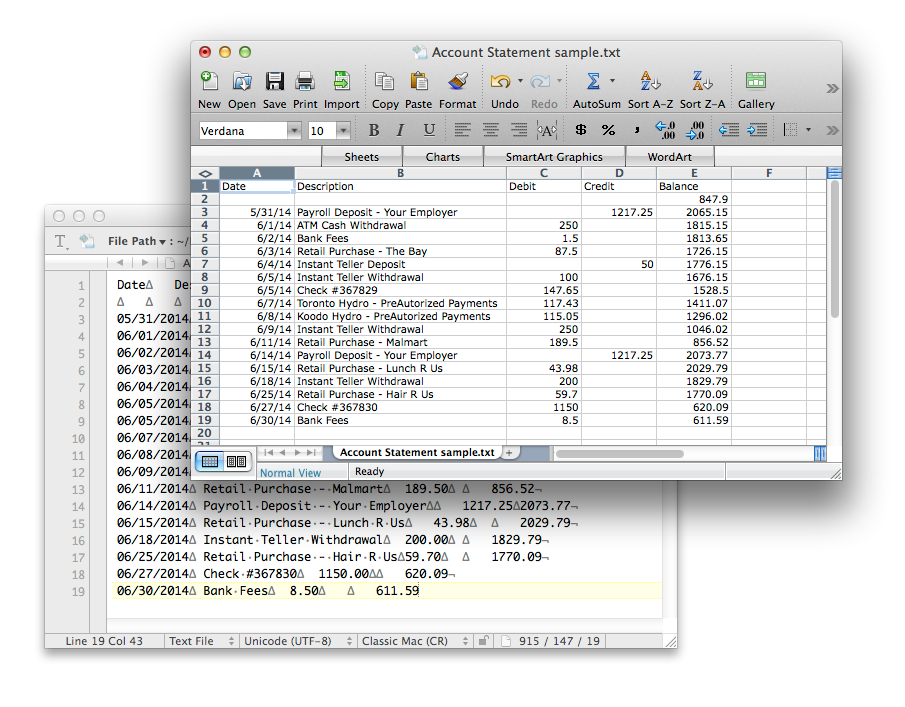
The Bank Statement file
As you can see in the previous screenshots, we have used a file with 19 records, 2 of them are actually invalid, the one with the column names and the one with the initial balance. Above is the file opened with Excel (front) and with a Text Editor (back).
Final touch and Importing
As said before, transactions not handled by any of your rules show a red background. They show a blue background otherwise. The Transaction list is partially editable. Indeed you have a 'last chance' to modify and adjust some fields before importing.
The editable fields are the transaction type, the origin and target accounts, the payee, and the comment. You can't modify the date and the number of fields.
Please note that clicking on the Preview button will overwrite all your changes. Once you have modified fields the next step is to click on the Import button to add all your transaction to your accounting.
Now let's see the 'How to import transactions from a Bank statement' video
iCash is a software intended to control your personal finance, keeping track of incomes, expenses, credits, debts and Banks transactions for you. As simple as creating the accounts you need and move money between them! You don't even need to know about accounting or even care about it! Your finances depends largely on good organization that lets you know where your money comes from and to where it goes.
iCash is an easy-to-use, full featured and multi-purpose Personal Finance Manager tool for macOS and Windows intended to help you control all kinds of money issues. iCash can serve several small accounting needs for either private users, or clubs, associations, self-employed, small businesses or simply to be used at home, making keeping track of incomes, expenses and Banks transactions a snap.
With a few clicks you can begin creating accounts and making transactions in minutes.
iCash is versatil and user-friendly. For this reason it doesn't use the principle of double-entry bookkeeping making it much easier to be used by people with very little or no accounting knowledge at all.
Simply create accounts for all your expenses, incomes, Banks... and start moving money between them! iCash will then allow you to find out where all your money comes from and where it goes. All accounts are well organized according to user-defined categories and built-in types so reports can be tailored to include all records or only ones meeting specified criteria.
Cash also allows you to have as many money manager documents as necessary so you can control almost anything from Clubs, associations, home and so on at the same time.
▾ Last videos, Online events and Q&A Sessions ▾
🔐 Secured by Sectigo SSL | UptimeRobot - Site Loaded properly